

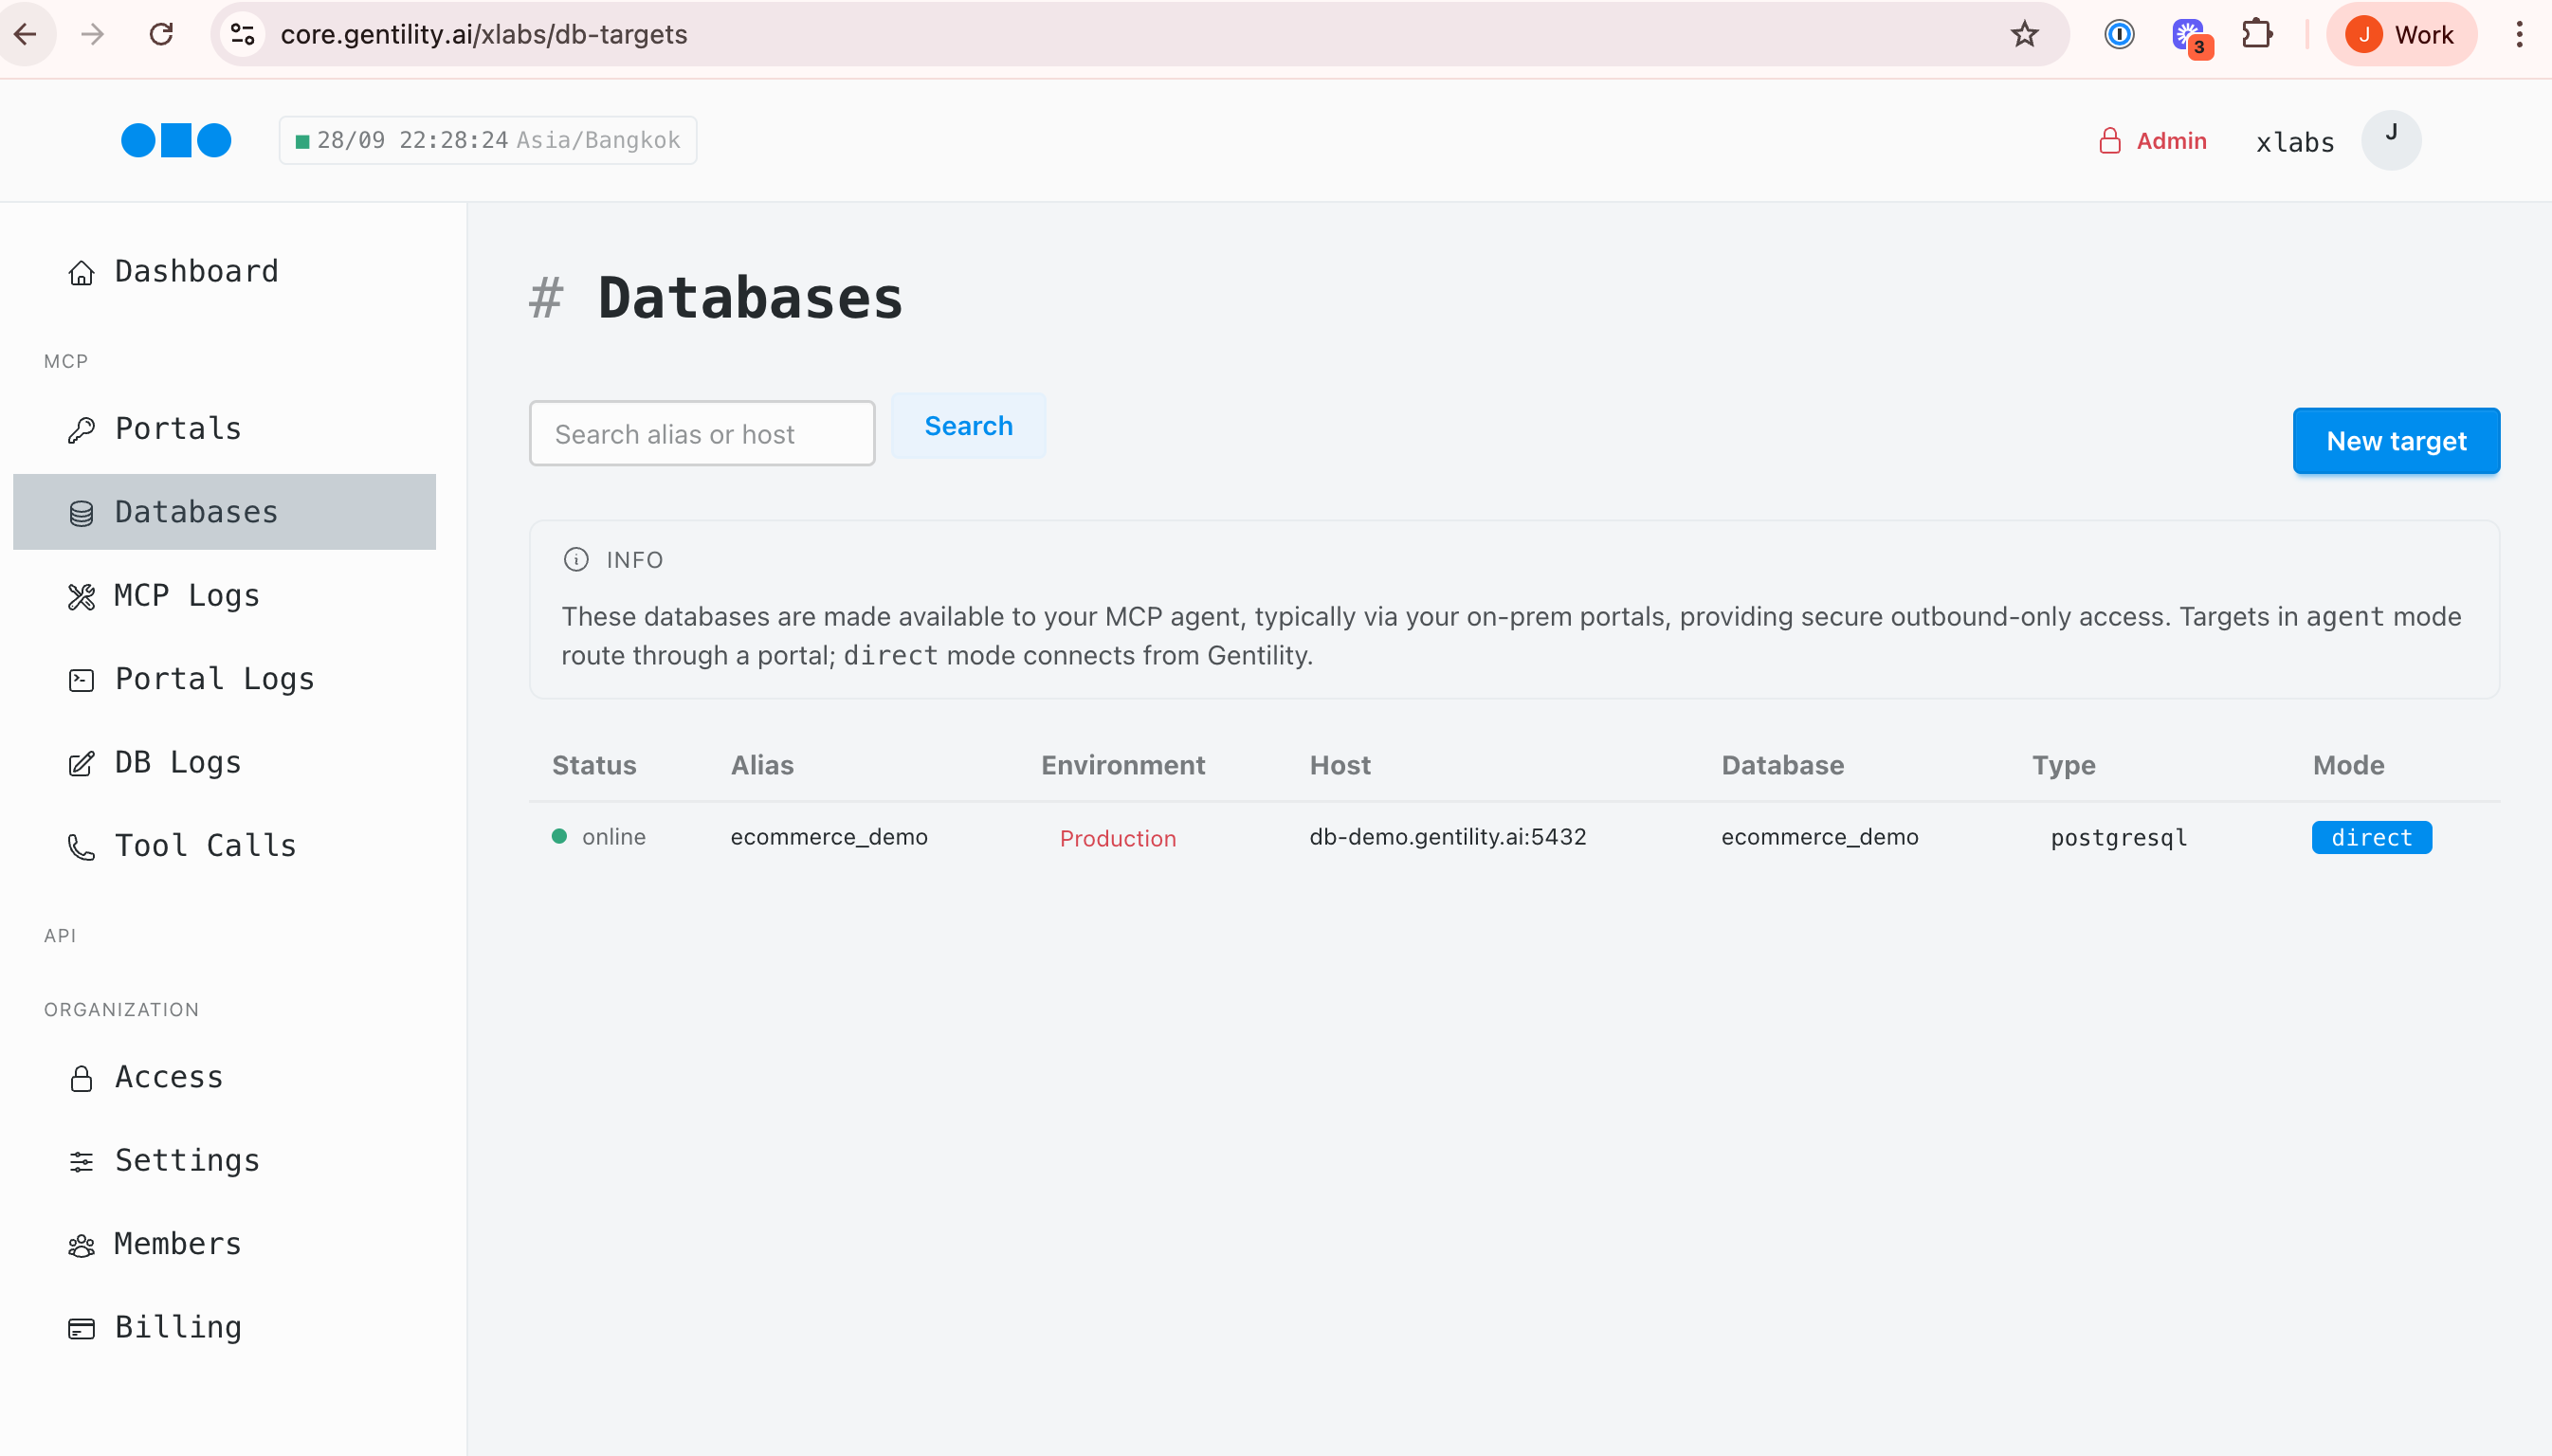
1) Open Databases in Console
In Console, navigate to Databases and click New target. You’ll see existing connections and their status.
Targets expose databases to your agent with policy controls. We recommend starting read-only while you confirm auditing and tooling. This guide uses our demo credentials, but the same flow applies to your own hosts.
In Console, navigate to Databases and click New target. You’ll see existing connections and their status.
Choose your database type then paste the connection string. Gentility parses the URL and pre-fills host, port, user, and database fields.
postgresql://readonly:[email protected]:5432/ecommerce_demo mssql://readonly:[email protected]:1433/ecommerce_demo 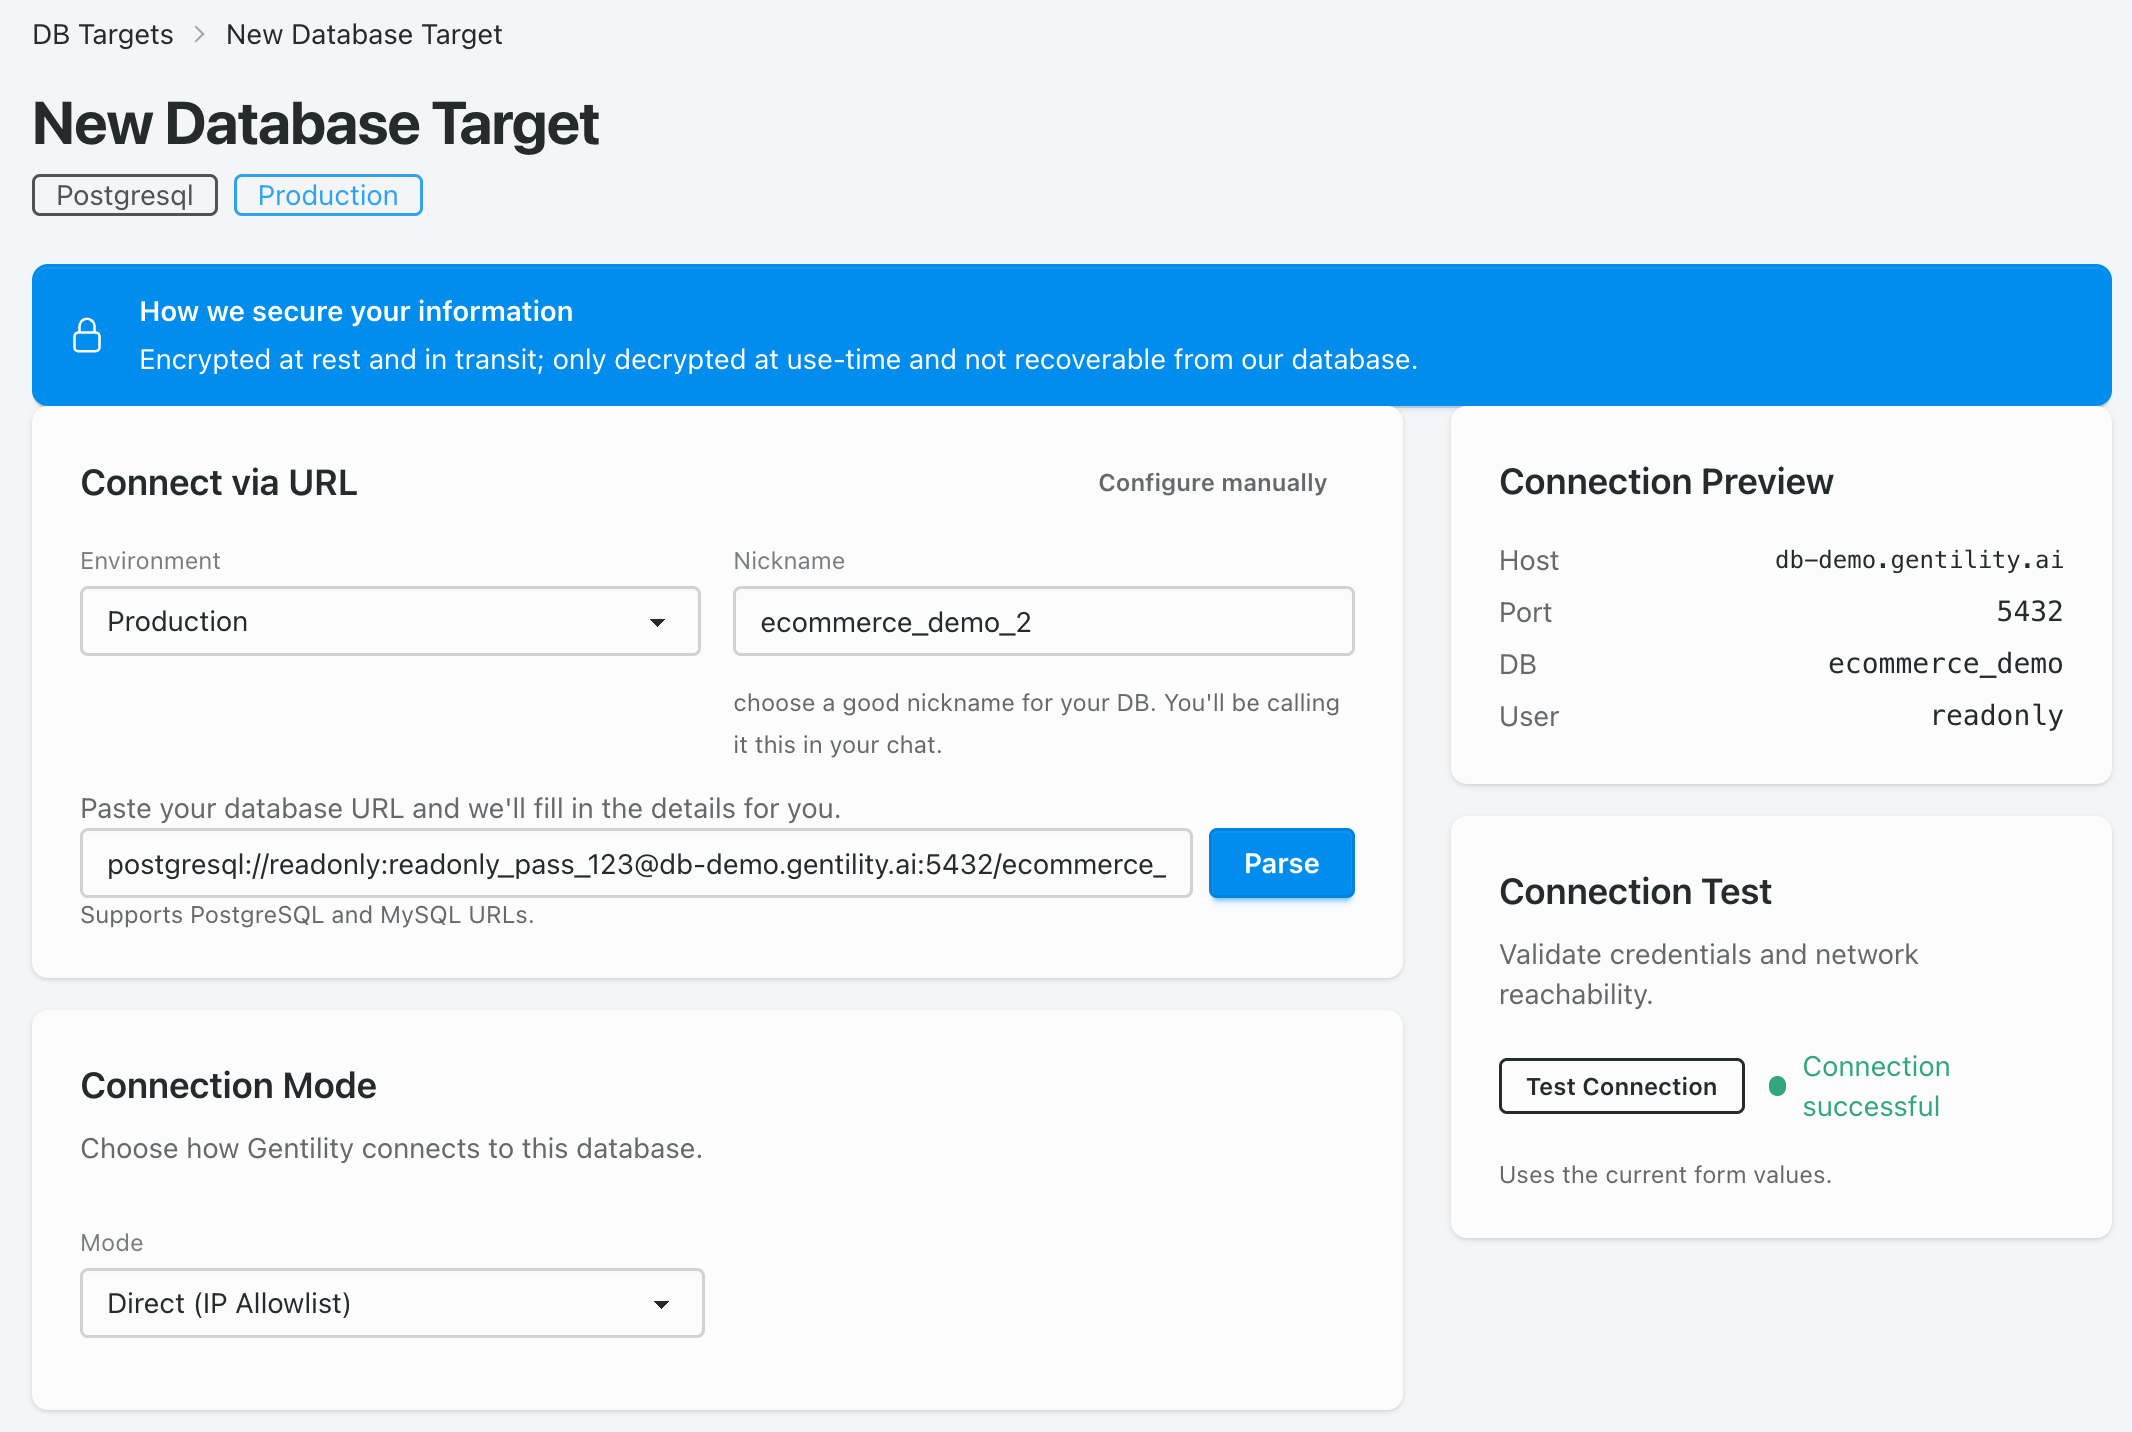
Start with Direct (IP Allowlist) or your Gentility portal depending on network placement. Keep Read-only enabled for initial testing.
Click Test connection. When the green success badge appears, save the target. The database is now exposed to Gentility tools with your chosen policies.
Hook the database into your MCP workflow or API calls, and monitor the initial command traffic via MCP Logs.